Do you Love me Yet? Is something I use to ask Charlie ALL of the time I figured the power of suggestion was on my side lol. Guess what? It worked! I wanted to make him a card for being my rock during these difficult times with my dad's illness and death. He certainly has been here for me in every way that I needed him to be. The images are Magnolicious, the flowers are Wild Orchard, the coloring is Copic Makers. Love, Elle
Elle's Creative Journey is all about my journey into the realms of artistic endeavors. How I will be adding more creativity and art into my everyday life. A personal art journal so to speak where I will share my thoughts and some of my attempts at creations with those who view my blog. Welcome and let the fun begin! Elle
Followers
Tuesday, March 29, 2011
Wednesday, March 23, 2011
Theory of Three's
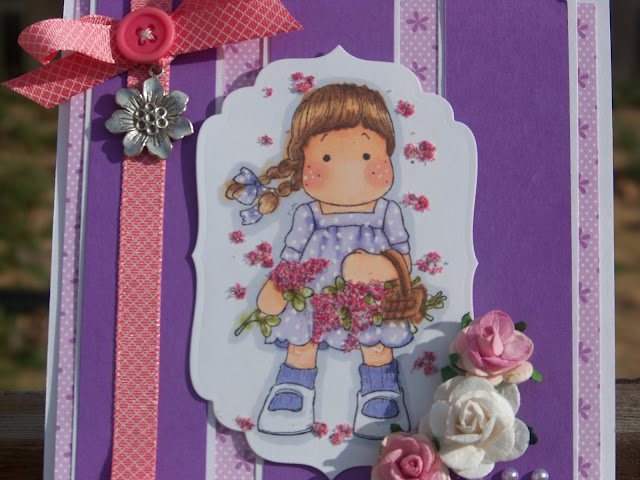
The design theory of three's has been around for ages and ages. Sets of three used in design give your eye a place to travel to. It is physically appealing. I rule that I tried to follow when I made the following card. Tilda on a windy day, wouldn't you say? Notice the three colored panels behind my main design as well as the three flowers, and the bow, button, and charm all of which sticks to the theory of three's. I also used just three primary colors-purple, pink, and white. Again I colored my image with my Copic Markers and used Flower Soft for my flowers in my design. I love the diminsion this adds! The other flowers are from Wild Orchard and the charm was bought off of Ebay. Love, Elle
It started with A Watering Can
It started with a watering can. I had purchased this Magnolia stamp with the intention of having one of my Maggies sit on top of it but none of my stamps fit the bill. What to do now? It so reminded me of Spring that I pulled out a little bunny stamp and a tiny grass stamp and started building my venue. I loved the paper that I was playing with (source unknown) and felt it lead itself to some scallop edges, buttons, and twine. I wanted to keep the feel of it nature like so I added a few flowers along with some die-cut leaves from a new PTI die set. I just LOVE their products! The back of this card is a note card to write your letter on. Love, Elle
Sunday, March 20, 2011
Two projects/Tag and Tilda using Charms
First I have to issue a disclaimer. I Love charms. Everything about them. On bracelets, on cards, on tags, on anything creative. I think they add that "finishing touch". I want to show you two projects today using the same charm with totally different looks.
The first one is a tag I made for a Birdcage swap with the group Art For The Creative Mind. I bought these wooden birdcages the other day at Archievers. I liked the intricacy of them. Remember when I dyed seam binding? I had forgotten about it until I was going through boxes yesterday so I thought I would incorporate some into this tag. I also added a vintage button as this is the "feel" I wanted for my project. Take a look:
Here is a close-up of Tilda hatching out of the egg:
The first one is a tag I made for a Birdcage swap with the group Art For The Creative Mind. I bought these wooden birdcages the other day at Archievers. I liked the intricacy of them. Remember when I dyed seam binding? I had forgotten about it until I was going through boxes yesterday so I thought I would incorporate some into this tag. I also added a vintage button as this is the "feel" I wanted for my project. Take a look:
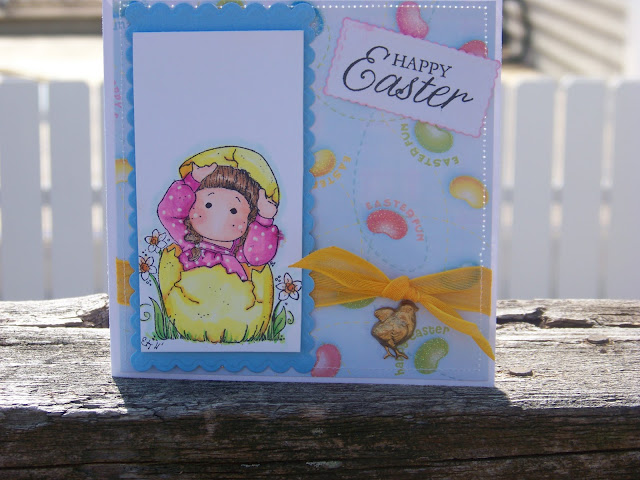
Here is my second project using the same charm. Tilda, being my favorite, is who adorns my Easter Card. (you know me, I LOVE the Maggie stamps!). Of course I had to pull out my Copic markers to color my image, making a mistake on the sleeve of her dress but I think imperfections just add to the appeal of a project, don't you? I wanted something bright and happy so I added some bright yellow ribbon and my chick charm. Isn't she cute? Love, Elle
Thursday, March 10, 2011
Thank you Card
My best friend's mother-in-law needlepointed me the most ADORABLE bunny coaster set that you ever did see and I wanted to make her a Thank You note to show my appreciation. I was SO excited when I was presented with the set! I chose some background paper that says "Shower you with Love" that was crying out for Tilda holding an Umbrella. I punched the bottom of the paper with a EK Success border punch for added texture. I colored my image with Copic Markers, again matching paper to color of marker. I had made these Rick-Rack flowers a while back and thought they would be a cute addition along with leave stick pins in place of actual leave embellishments. It was missing something. I had already sewn my contrasting yellow paper to the background paper using my Huscavena sewing machine but wanted another element. Since I always follow the design rule of "three's" I added three blue buttons pulling the blue color of the background paper out. You should see the rick-rack flowers in person0they are so sweet. Love, Elle
Monday, March 7, 2011
My goals
One day I was talking to my dad right before he died and he made me promise to "keep up" with my art. Not only did I promise him I told him of my goal to be published in a magazine. AND to learn how to take better photographs of my work. Mind you, my sister Pam is a professional photographer who happens to live out of town and who changed the settings on my computer, giving me tips. BUT my photos suck (OOPS! did I say that??) I started using natural light. I use a tripod. Always, it seems, they seem blurred to me. Don't they? I view different blogs and the ones I like best are the blogs that have clear, crisp photos. How do they achieve that? Darned if I know! Does anyone have any tips? A photo box maybe? Hum.....I just don't know. You know how it is when you make a promise to a dying man you darn well better follow up with it, you know what I mean? Of course there were other promises-keep exercisising, take care of my physical self, that sort of thing. Easy compared to good photos! HELP I say HELP! I am coming to you for tips and suggestions. Anyone want to come to my house and do it for me? lol. Seriously, HELP! Love, Elle
Friday, March 4, 2011
Butterfly Tilda
I have been wanting to ink up Butterfly Tilda for awhile now but have been unsure of my coloring abilities and my ability to do this one justice. How often do we stop ourselves from doing something just because our negative voices are loud and clear? Of course I can color it! I followed a rule of color by taking my paper(s) and matching my colors to that paper. You can't go wrong if you follow that rule! I LOVE, LOVE, LOVE the blue flower trim on the bottom. Since doilies are all the rage this year I based my image upon a small, cute little doily that I purchased at the dollar store. I changed my mind on how to use the green ribbon but am pleased with the way I added it to my card. Something seemed to be missing. I remembered reading a design tip about working in "threes". Adding three white buttons using green twine was just what my card needed. I had sewn my background papers on giving the card a more homespun feel. I shouldn't have been afraid because my card turned out just the way I wanted it to! My mom just moved into a new apartment I added the wording "From my heart to your home" on the inside along with a personal message. I wanted to send her a "happy" card in order to cheer her up. Did I succeed? Love, Elle
Wednesday, March 2, 2011
Butterflies floating by......
I am in the mood for Spring. What better thing to add to my project than butterflies! All colors and sizes. Flittering across the page. I needed another notebook for grocery shopping (see tutorial from an earlier post) so I decided to use happy Spring colors, pretty lavendar and yellow buttons and butterflies galore. Aren't they beautiful? I will be making a bunch of these in the next few days for my stash. Friends and family like them too. Love, Elle
I wanted to show you a close up of the buttons and mini clothspin that I added at the button. Aren't they spictacular?
I wanted to show you a close up of the buttons and mini clothspin that I added at the button. Aren't they spictacular?
Subscribe to:
Comments (Atom)


